Windows子系统搭建Vim
注意:本文档没有任何问题,请仔细阅读文档,按步骤完成,不要轻易质疑文档的正确性;遇到问题,请大家先仔细阅读屏幕输出,不要直接提问
Windows10下Linux子系统
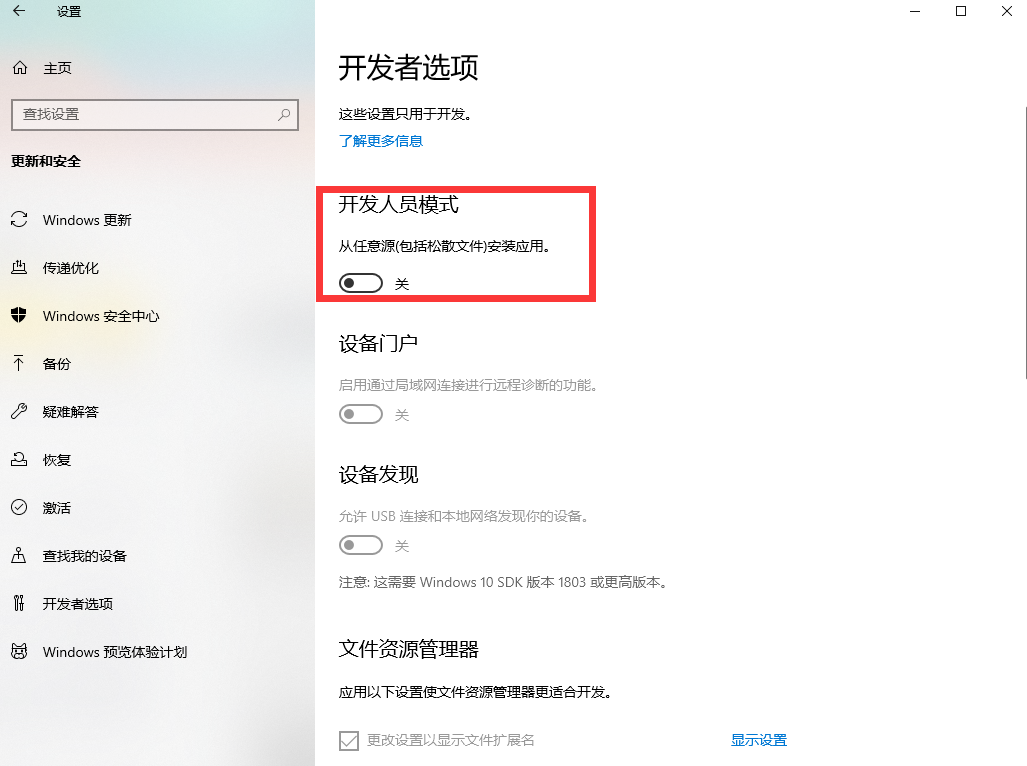
1、启用开发者模式
设置-更新和安全-针对开发人员-开发人员模式-等待完成(可以不开)
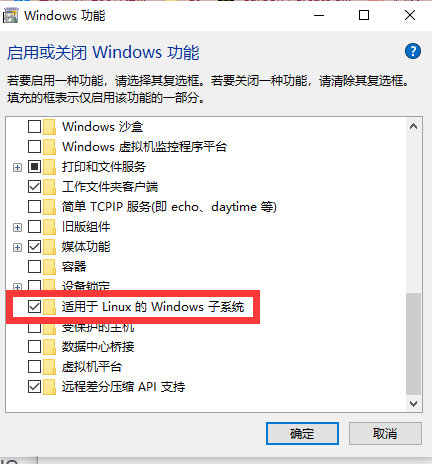
2、设置-程序和功能-启用或关闭windows功能-适用于Linux的Windows子系统-确定-等待安装完成并重启PC
3、安装Linux
打开windows10的应用商店,搜索ubuntu,选择需要的版本点击-获取
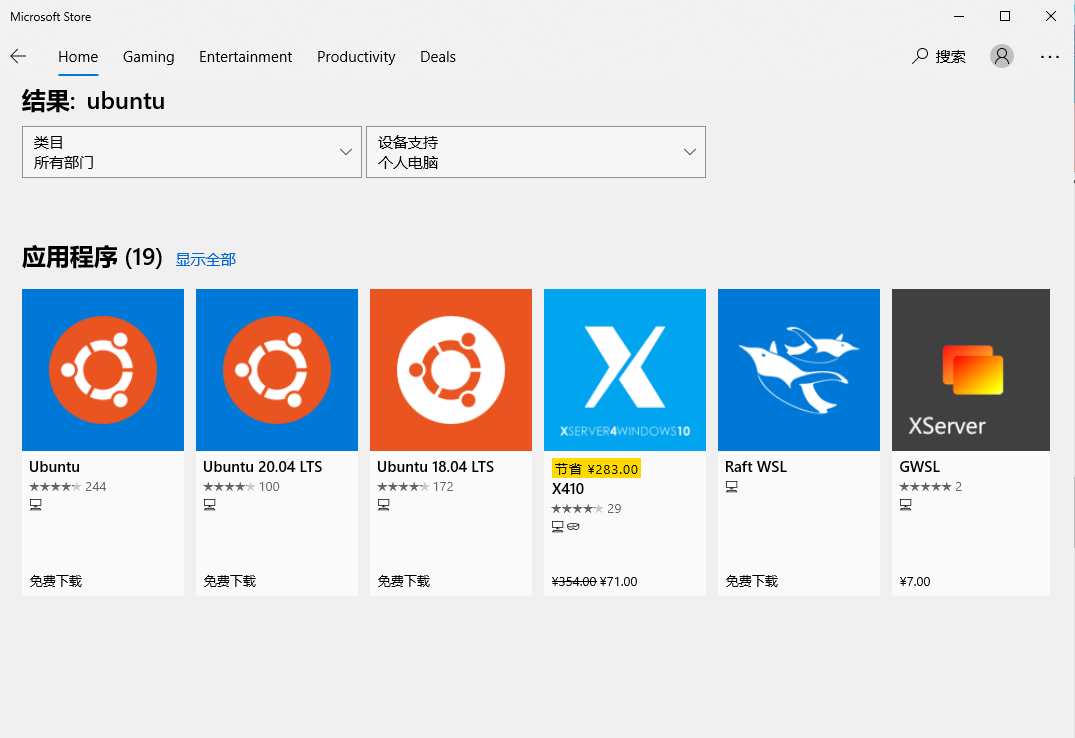
我这里选择的是ubuntu20.04,点击获取后等待安装完成
4、启动
在开始菜单中找到安装的ubuntu点击启动,第一次启动需要设置用户和密码按照提示设置即可。
换源
Ubuntu系统自带的源都是国外的网址,国内用户在使用的时候网速比较慢,这样我们在下载或更新软件时就会十分痛苦。所以对于一个新手来说,给Ubuntu换源,就显得十分必要了。
一:备份原来的源
1 | sudo cp /etc/apt/sources.list /etc/apt/sources_init.list |
注意,我们操作Ubuntu一般都是要在管理员权限下进行操作的,尤其是要对系统文件进行更改。sudo就是告诉系统使用管理员权限运行后面的命令。敲入回车后输入我们之前设置的密码即可运行。
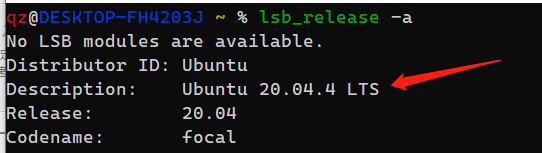
二:查看版本号
1 | lsb_release -a |
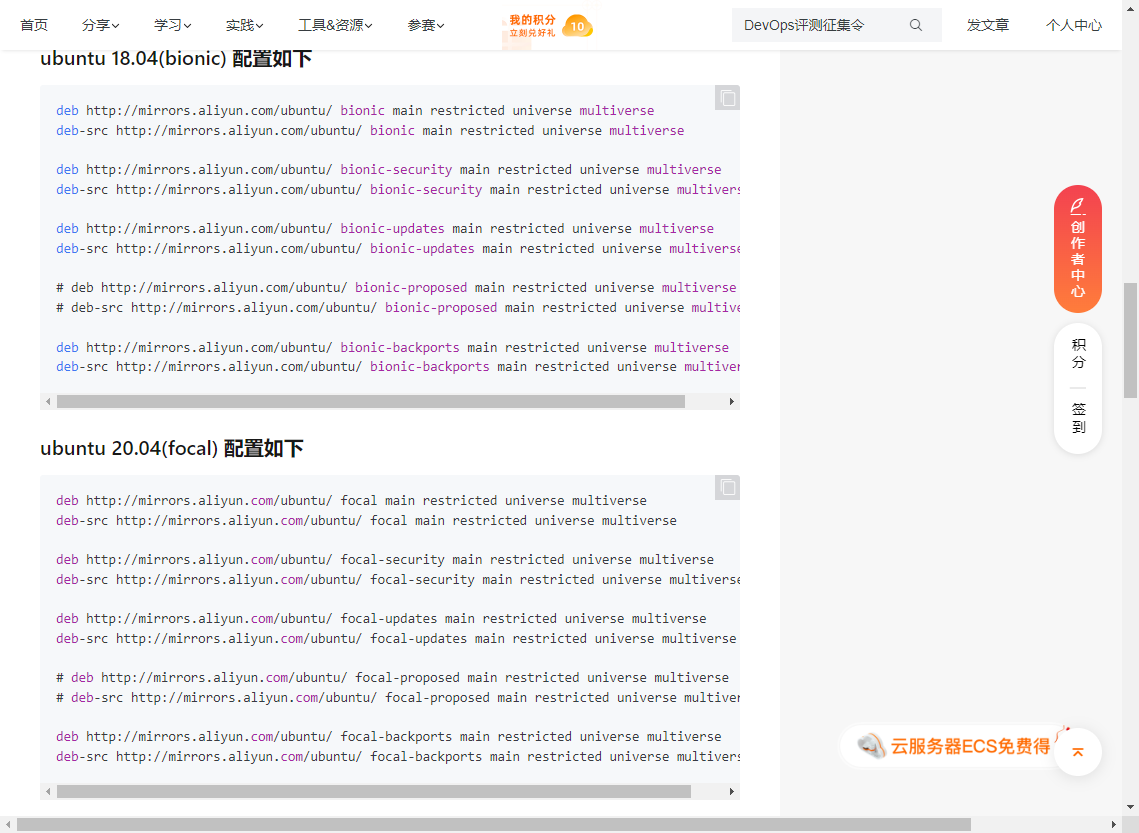
三:更换阿里源
进入更换阿里数据源 打开网站 找到对应版本数据源
1 | //阿里源地址 |
1 | //清华源地址 |
1 | sudo vim /etc/apt/sources.list |
将文件里的内容全部删除(可在vim的命令模式下,使用gg将光标移到文件首行,使用dG命令清空文件),敲入i进入编辑模式,将下面内容粘贴(ctrl + shift + v)进文件 保持原有格式粘贴(esc 后 输入: set paste 在按下i键 ctrl + shift + v)
1 | //阿里源20.04LTS |
按ESC(或Ctrl + [)退出编辑模式进入命令模式,然后先按“:”,再输入wq,敲入回车,文件即写入成功。
三:更新系统
输入下列命令,等待更新完毕~
1 | sudo apt-get update |
安装系统后的环境准备
配置sshd
Vim的简单使用,请百度
使用命令
sudo vim /etc/ssh/sshd_config打开sshd的配置文件,找到ClientAliveInterval和ClientAliveCountMax并将其修改为(如果没有直接添加即可):60 3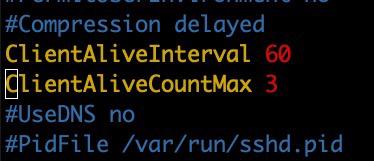
重启sshd服务
1
sudo service sshd restart
如果上述命令报错,大致内容为sshd这个服务不存在的话,就执行
sudo service ssh restart
以下所有配置,都是为了优化终端,提升使用效率,如果你已经能独立对bash,zsh,vim等进行配置优化,可自行选择方案,无需完全按照这个方案
GitHub访问优化
请进入这个网址:点击这里
找到图中的
IP1
在上面的网站上搜索
github.com,找到IP2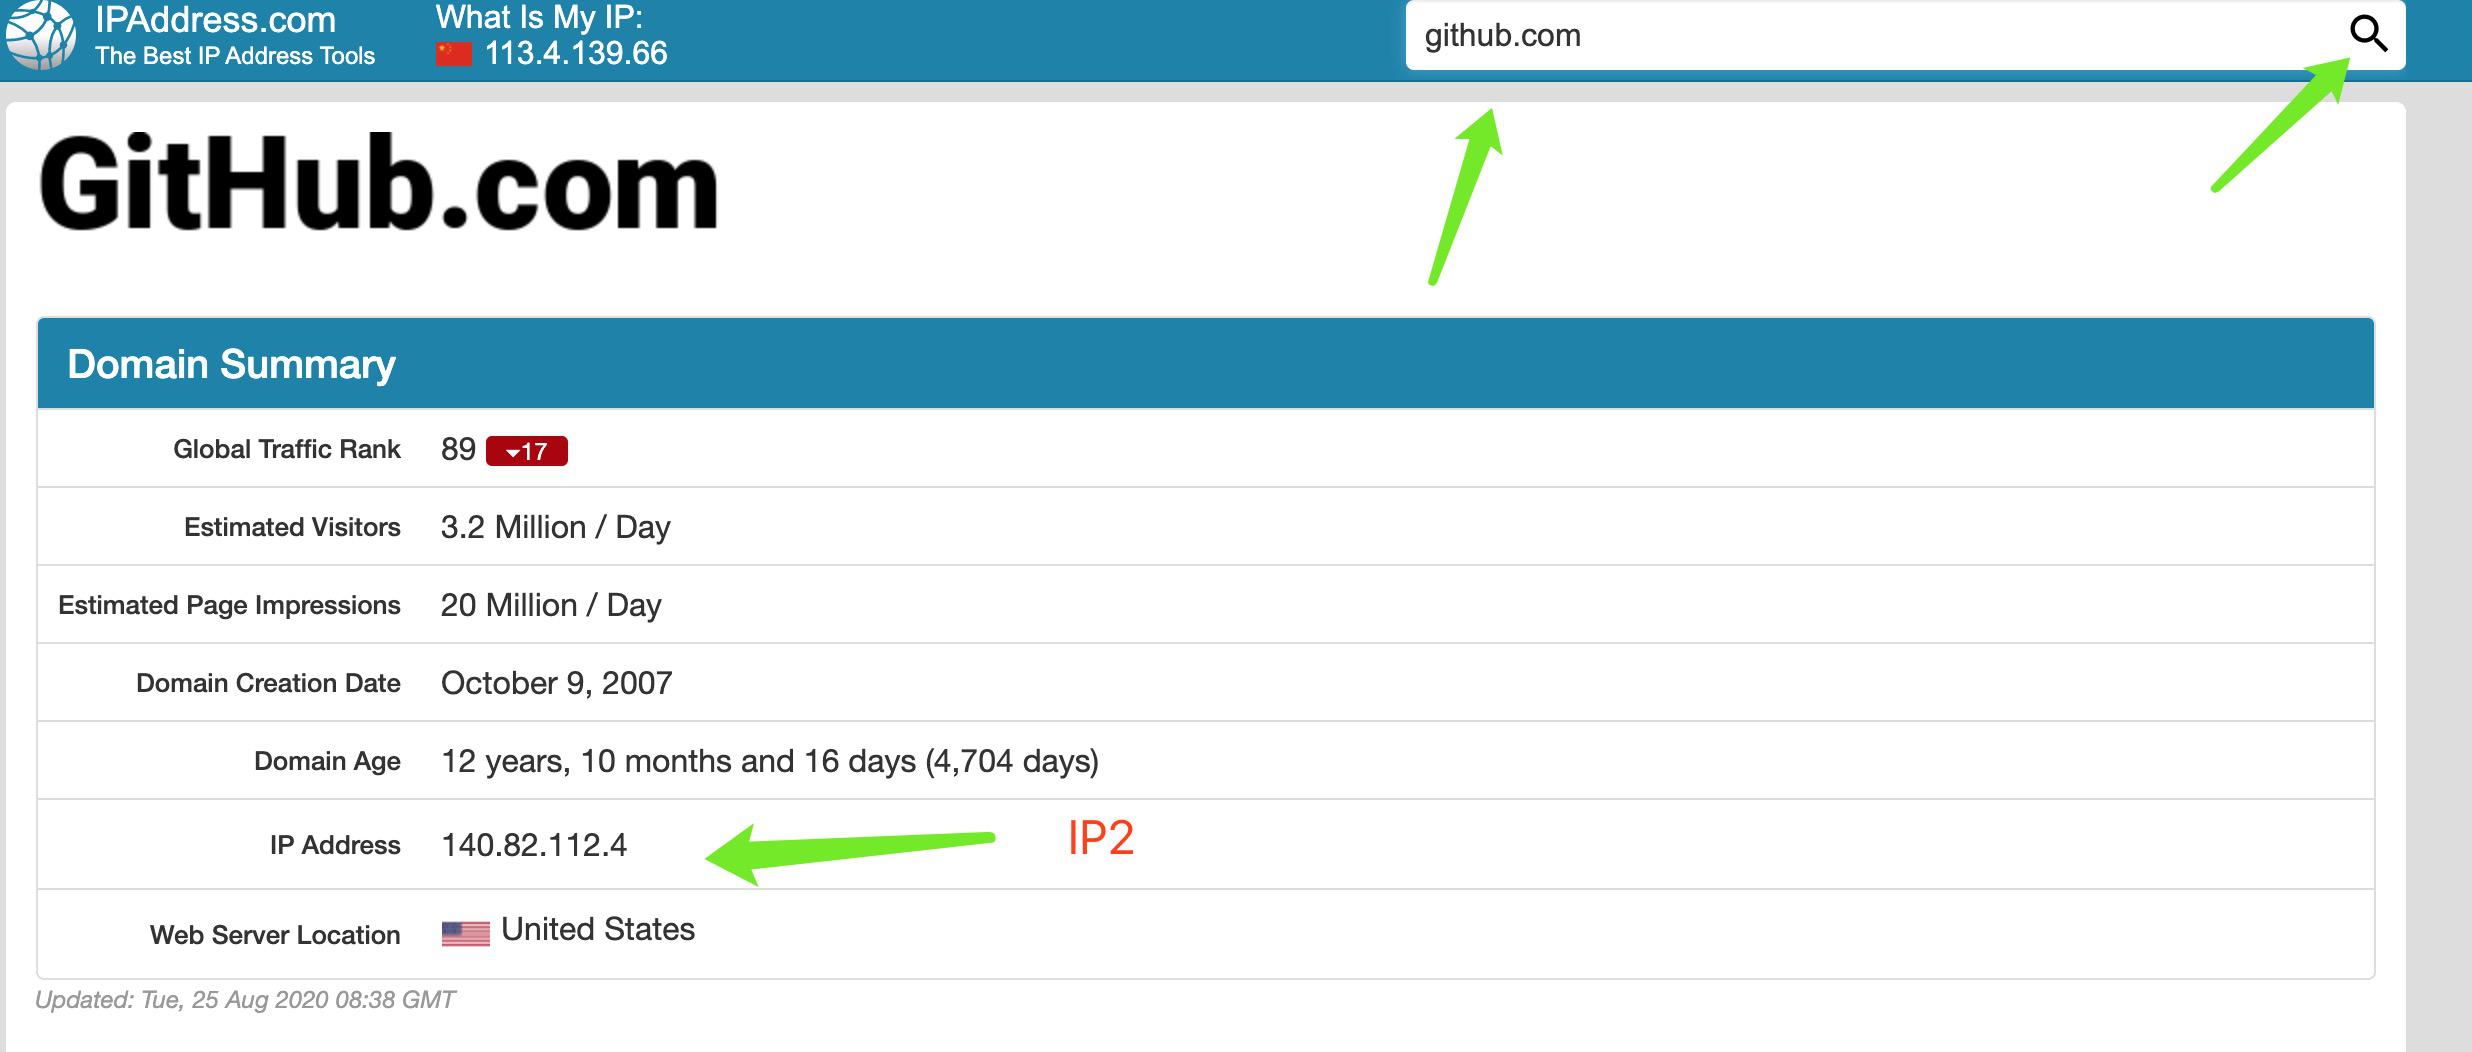
使用命令
sudo vim /etc/hosts打开hosts文件,并在最后加入以下信息1
2199.232.69.194 github.global.ssl.fastly.net
140.82.112.4 github.com保存并退出
vim
###配置Vim(使用新添加的用户操作)
在后续的学习过程中,会使用
vim写程序
Vim配置推荐 - ma6174(不用打开这个官方网站)
更新apt源信息
1
sudo apt update
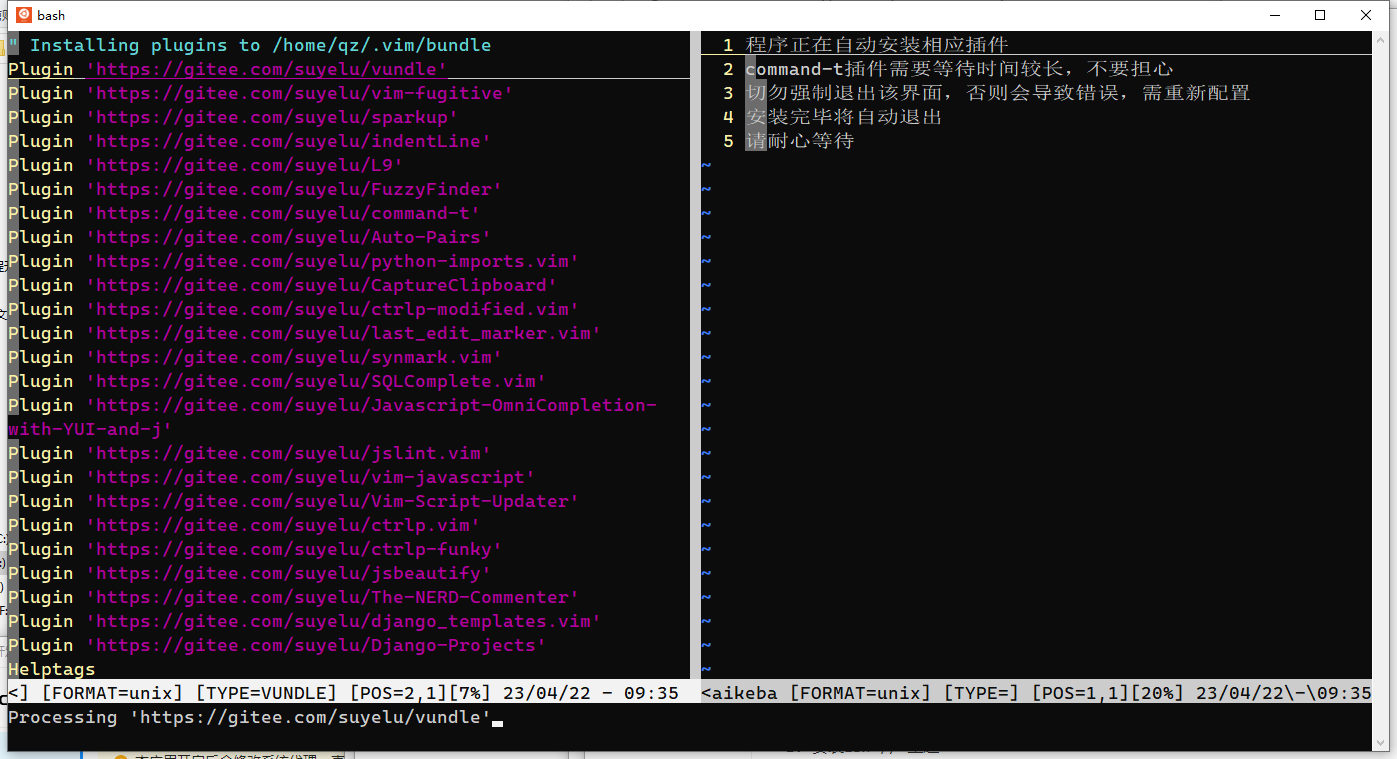
配置vim,执行下面命令配置安装vim
sudo apt-get install git
1
2wget 47.93.11.51:88/install_vim.sh
bash install_vim.sh
vim的配置因为需要安装较多插件,所以需要等较多时间,大家耐心等待
如果出现括号不能自动匹配情况重新安装第二条命令即可
zsh的安装及配置
- 安装zsh // 主题
1 | sudo apt install zsh |
- 修改默认shell为zsh // 应该是修改主题
1 | chsh -s /bin/zsh |
- 安装oh-my-zsh //
1 | sh -c "$(wget https://raw.github.com/robbyrussell/oh-my-zsh/master/tools/install.sh -O -)" |
- 安装zsh-syntax-highlighting // 代码高亮插件
1 | git clone https://github.com/zsh-users/zsh-syntax-highlighting.git ${ZSH_CUSTOM:-~/.oh-my-zsh/custom}/plugins/zsh-syntax-highlighting |
- 使用命令
vim .zshrc打开.zshrc文件,找到plugins=()这一行,将zsh-syntax-highlighting添加进去
1 | plugins=(git zsh-syntax-highlighting) |
- 安装其他插件
1 | ##命令自动补全插件 |
- 使用命令
vim .zshrc,打开后在最后插入以下内容:
1 | #设置终端颜色,提示符,及上一条指令返回码提示 |
注意,复制后可能会因为Vim的配置导致以上内容被注释,也就是在前面加上了
#,如果有的话,删掉就行。
ctags安装与配置
- 使用以下命令安装ctags
1 | sudo apt install ctags |
- 执行以下命令
1 | ctags -I __THROW -I __attribute_pure__ -I __nonnull -I __attribute__ --file-scope=yes --langmap=c:+.h --languages=c,c++ --links=yes --c-kinds=+p --c++-kinds=+p --fields=+iaS --extra=+q -f ~/.vim/systags /usr/include/* /usr/include/x86_64-linux-gnu/sys/* /usr/include/x86_64-linux-gnu/bits/* /usr/include/arpa/* |
- 使用命令
vim .vimrc编辑.vimrc,在最后添加以下内容
1 | set tags+=~/.vim/systags |
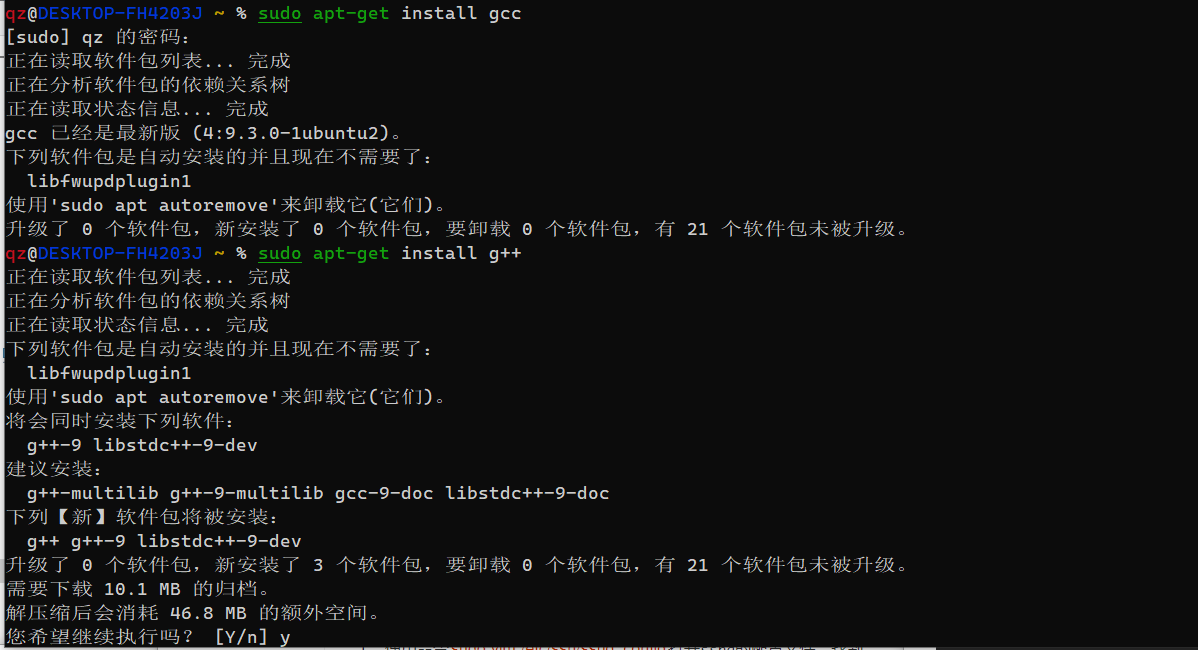
安装 gcc/g++
gcc 安装命令
1 | sudo apt install gcc |
g++ 安装命令
1 | sudo apt install g++ |
运行各种程序的run脚本
查看环境变量echo $PATH,在任意一个目录下创建一个run文件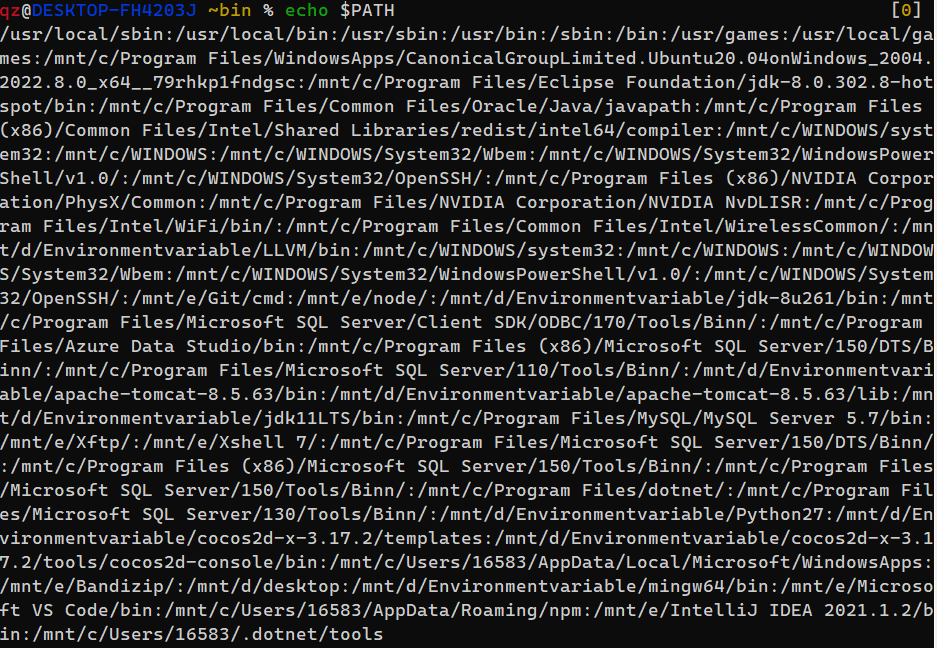
或者在环境变量里面新建一个文件
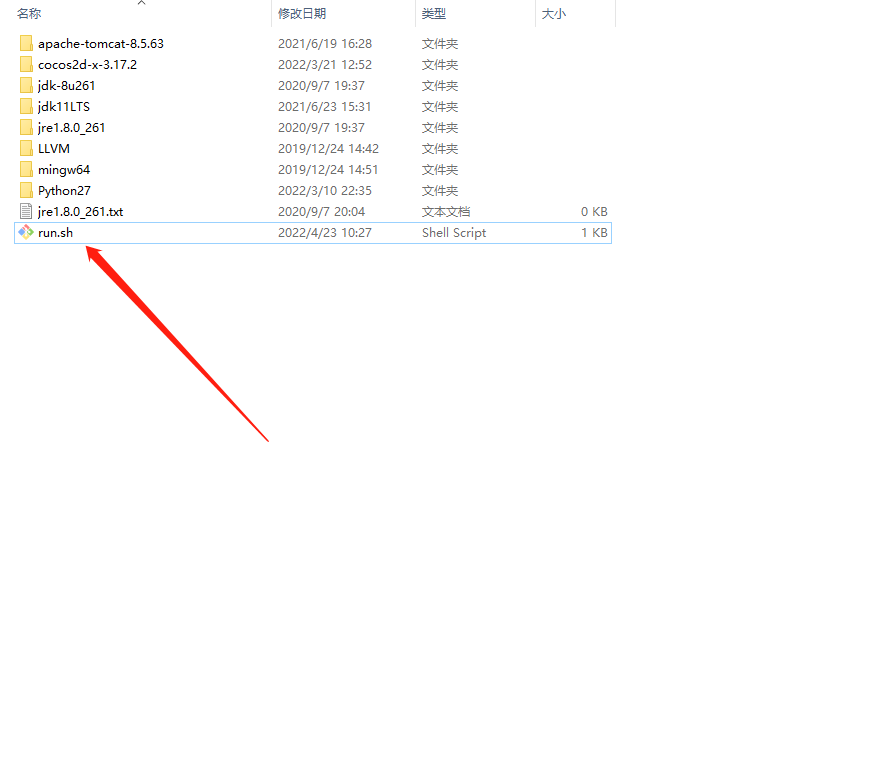
- run文件内容
1 |
|
- 保存后给run文件加上x权限
chmod +x run - 以后执行.c .cpp .sh .py文件时就直接run + 源文件名就可以了
安装glibc-doc
- 使用以下命令安装
1 | sudo apt install glibc-doc |
Vim下字体修改
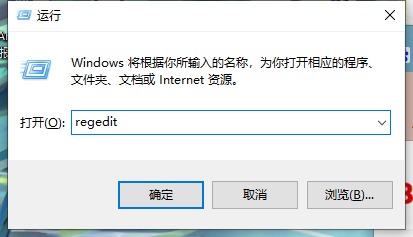
windows + r打开运行输入regedit
找到这个
1 | 计算机\HKEY_CURRENT_USER\Console\C:_Program Files_WindowsApps_CanonicalGroupLimited.Ubuntu20.04onWindows_2004.2021.825.0_x64__79rhkp1fndgsc_ubuntu2004.exe |
这里是我更新之后的个个版本(每次更新都需要重新设置一下字体)
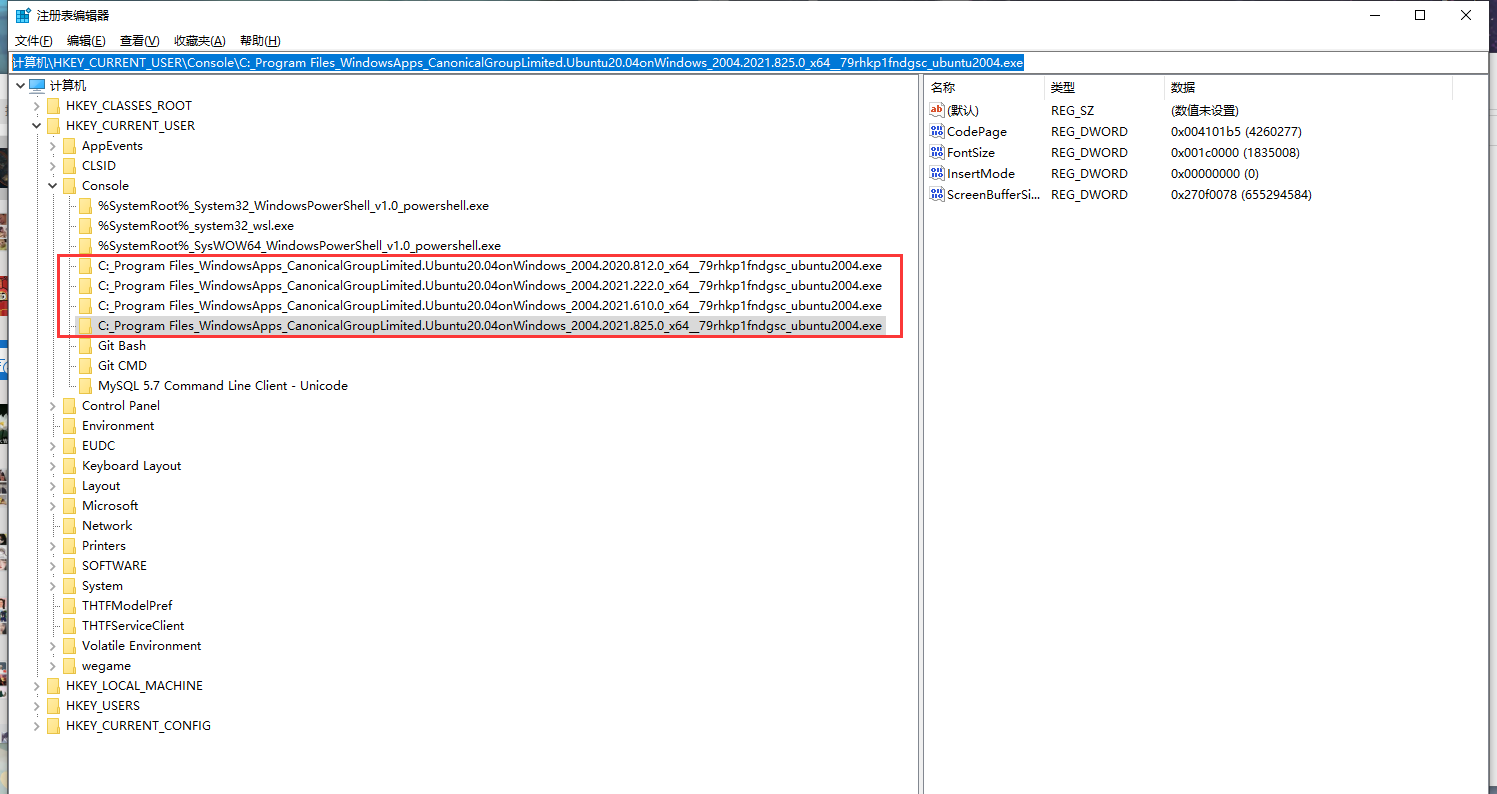
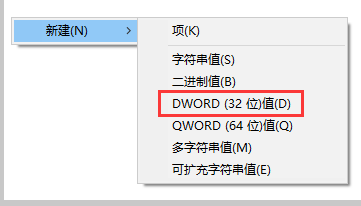
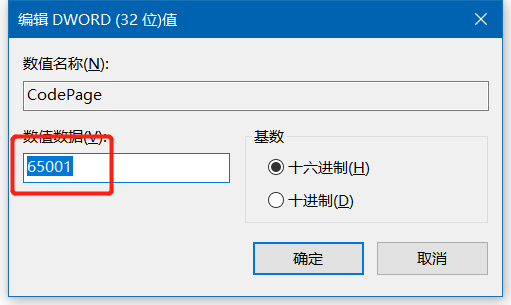
在右侧添加新建一个Dword键
CodePage是用来设置终端代码页的选项,65001是UTF-8,这个可以支持各种字体。这是关键。
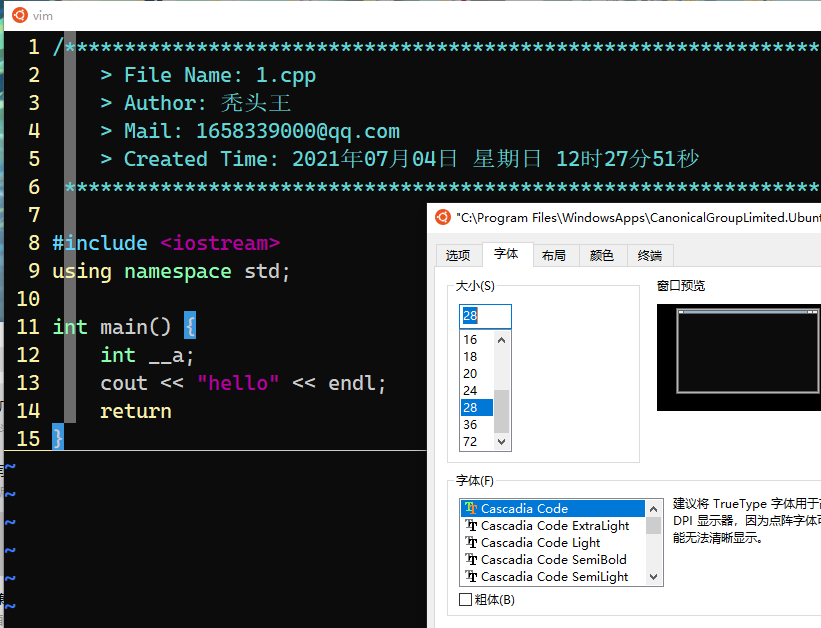
保存,退出,再次打开Ubuntu,就可以自由的设置喜欢的字体了,连VIM也一并搞定。
自己设置的是 Cascadia Code 字体还挺好用的~
中文设置 - 在20.04中好像时效了
因为是刚刚安装的需要更新下软件源和软件包:
时间可能会久点
1 | sudo apt update |
安装中文语言包
1 | sudo apt install -y language-pack-zh-hans language-pack-zh-hans-base |
设置中文环境变量
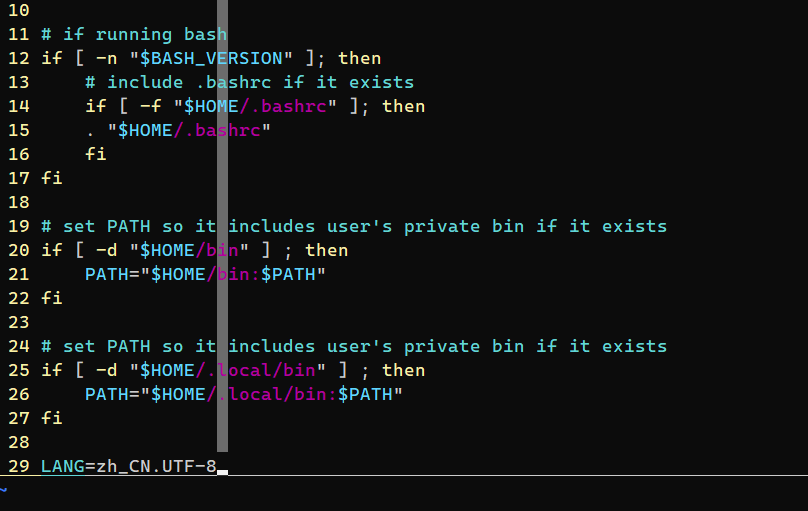
vi ~/.profile
1 | 在末尾新增一行:LANG=zh_CN.UTF-8 |
设置完毕重新打开ubuntu即可,部分软件及命令不支持汉化以ls命令为例:
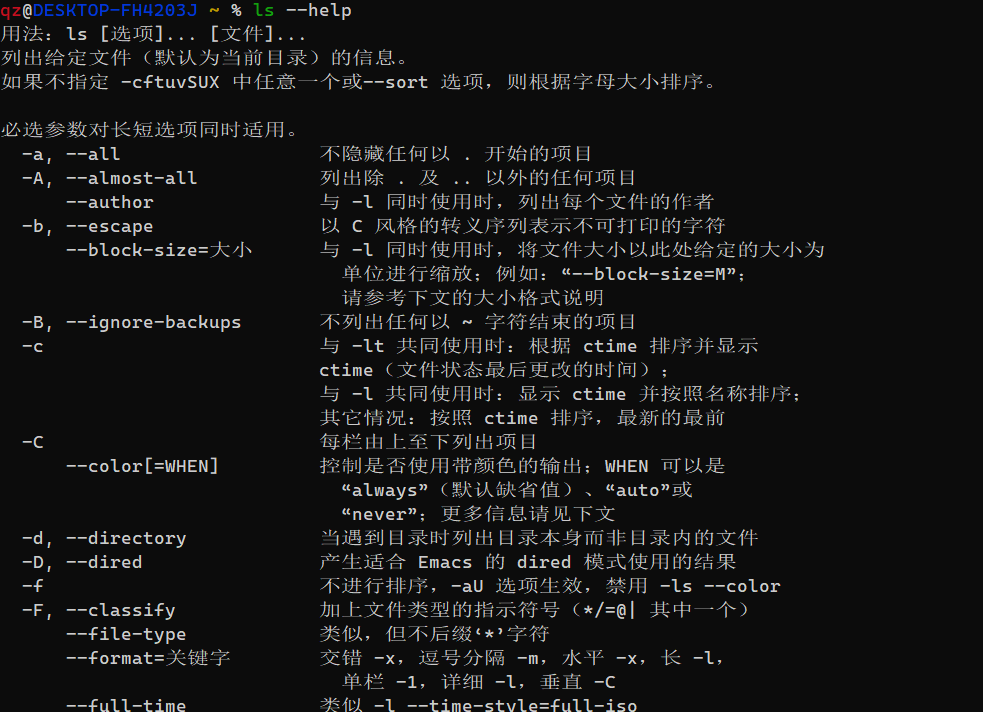
中文设置
先查找一下是否有apt-cache search language-pack-zh-hans中文包,如果没有则需要更新一下软件源。

之后执行
sudo apt install -y language-pack-zh-hans
安装中文包,需要管理员密码。

之后会提示是否安装,输入y。
安装完成会看到语言的名字。
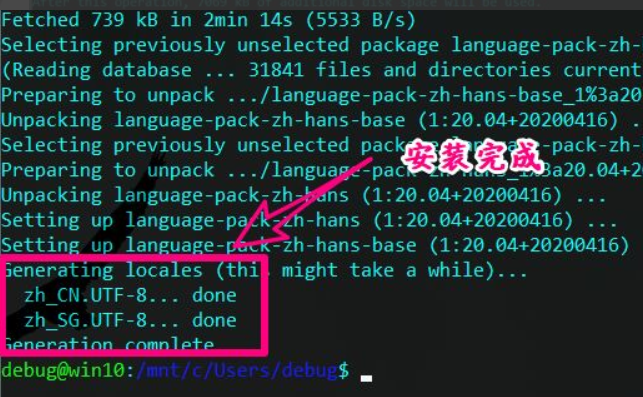
sudo update-locale LANG=zh_CN.UTF-8

之后看一下帮助信息,已有中文显示了。
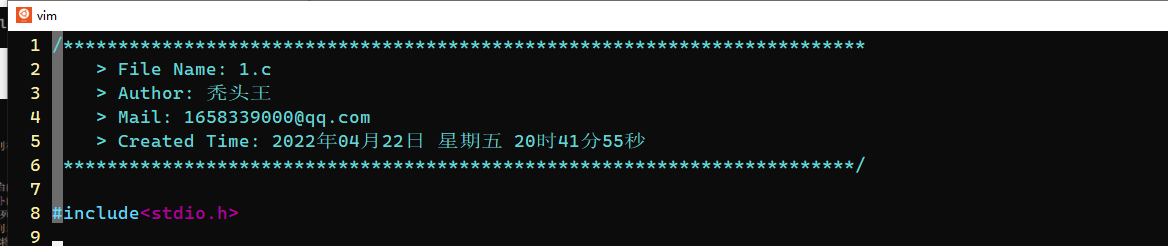
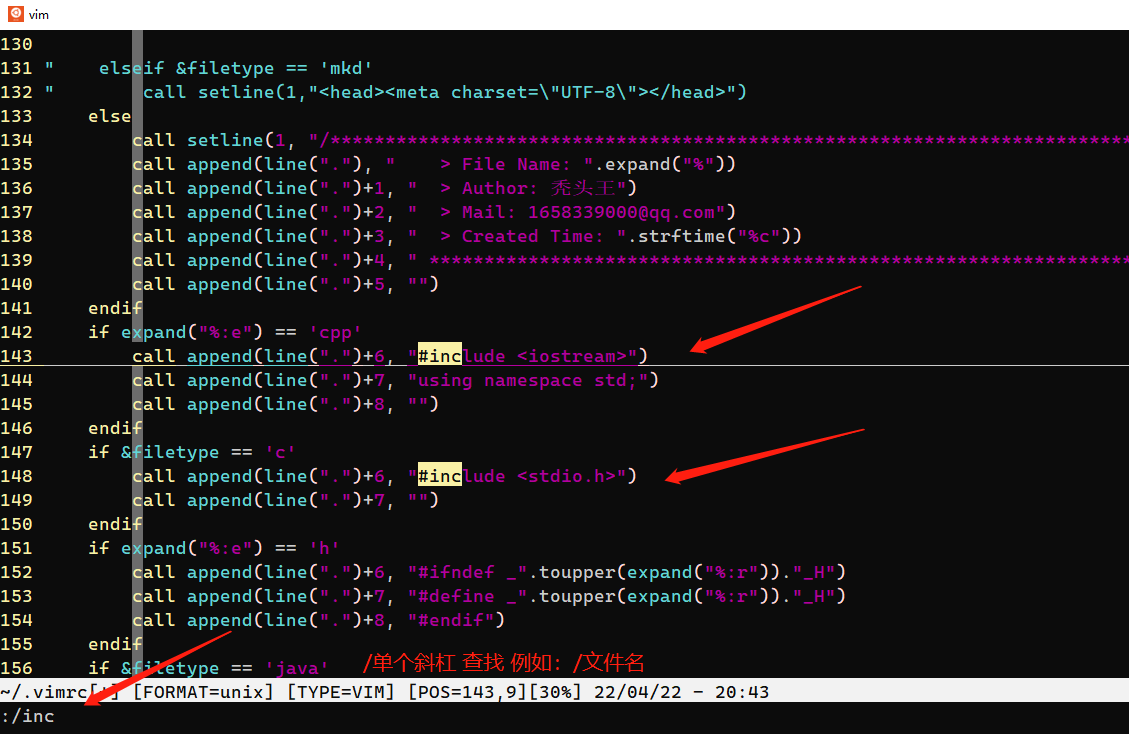
vim设置代码文件作者信息等
vim .vimrc
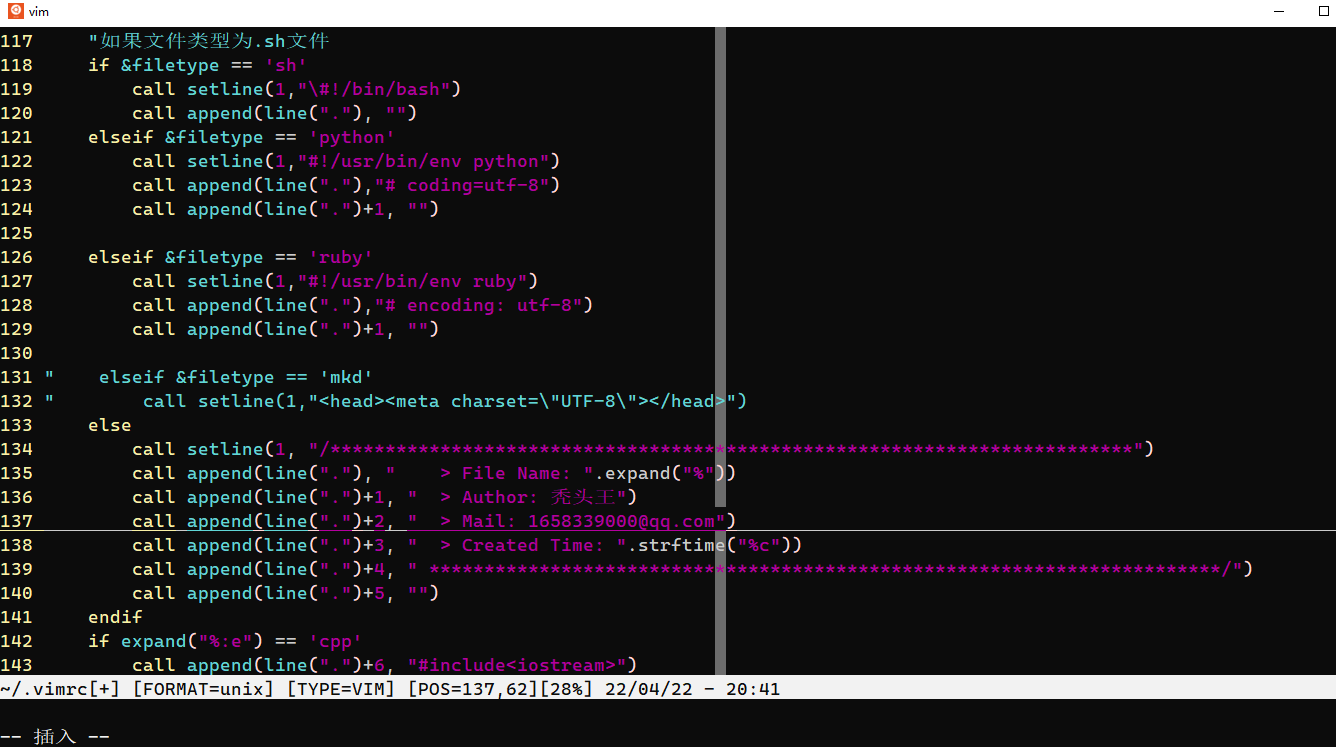 创建文件 vim test.c